
Home » Documentation » Tutorials and Guides » NASLite Encrypted Storage with TrueCrypt
NASLite Encrypted Storage with TrueCrypt
The following tutorial provides step-by-step instructions on how to use TrueCrypt storage volume containers with NASLite.
- What is TrueCrypt?
-
TrueCrypt is a software tool used for creating and maintaining an encrypted storage volume. Data stored on the encrypted volume cannot be read (decrypted) without using the correct password or encryption keys. The entire file system is encrypted including file names, folder names, contents of every file, free space, meta data, etc.
- Why Use TrueCrypt?
-
The primary reason one may want to use TrueCrypt would be to hide data and make it unavailable to anyone without a valid password or encryption key. One very useful feature offered by TrueCrypt is the ability to create and mount storage volume containers. Files can be copied to and from a storage volume container just like they can be copied to and from any conventional disk. The storage volume container is simply a binary file and can be stored just about anywhere including a share on your NASLite server. The following tutorial provides a step-by-step explanation of how to install and effectively use TrueCrypt storage volume containers with NASLite.
- Acquiring TrueCrypt
-
TrueCrypt is free software and can be downloaded from the official TrueCrypt website ( http://www.truecrypt.org ). TrueCrypt is available for Windows 7/Vista/XP/2000, Mac OS X and Linux. Based on your operating system, download and install the appropriate version. The examples below show the use of the Windows version.
- Initial Considerations
-
Before creating a TrueCrypt storage volume container, we must decide where to put it and how big to make it. For the purpose of this tutorial we can assume that we need 1 gigabyte of encrypted storage and we want it to reside on a NASLite network share so it gets backed up by our NASLite mirror as well as be available for access using other computers on the LAN.
- Starting TrueCrypt
-
Launch the TrueCrypt software tool by clicking the TrueCrypt shortcut in your Windows Start menu. The main TrueCrypt window will open. This window allows one to create, mount, unmount, modify and manage TrueCrypt storage volume containers.
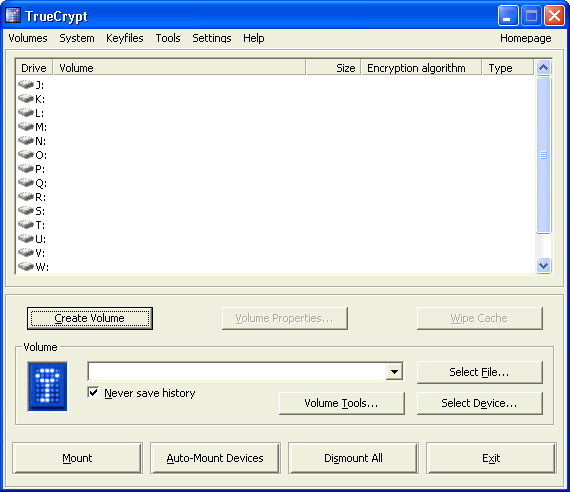
TrueCrypt
- TrueCrypt Volume Creation Wizard
-
Before we can mount and use a TrueCrypt storage volume, we need to create a container for one. That is achieved using the TrueCrypt Volume Creation Wizard. Launch the TrueCrypt Volume Creation Wizard by clicking on the Create Volume button. The TrueCrypt Volume Creation Wizard should now open.
The first screen of the Wizard allows us to select the media to be used for our encrypted storage volume. Since we intend to host the storage volume on our NASLite server, the logical choice would be to Create an encrypted file container. Select that option and click on the Next button to continue.
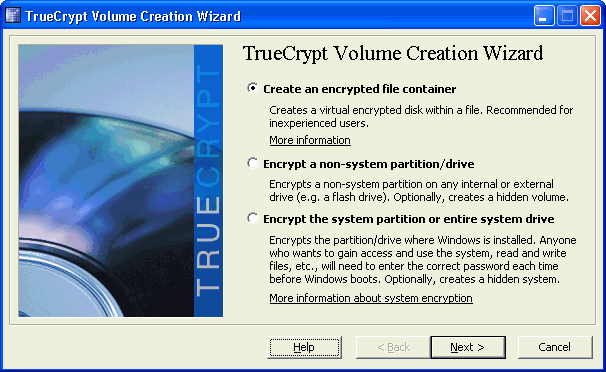
TrueCrypt Volume Creation Wizard
- TrueCrypt Volume Creation Wizard - Volume Type
-
At the second screen of the TrueCrypt Volume Creation Wizard we select Standard TrueCrypt volume and click on the Next button to continue.
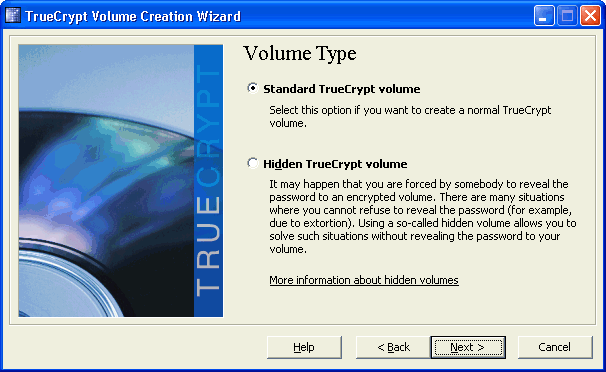
TrueCrypt Volume Creation Wizard - Volume Type
- TrueCrypt Volume Creation Wizard - Volume Location
-
The third screen allows us to select the location of the encrypted storage volume container. Since the storage volume container is just a regular file we can place it directly on our NASLite server. Use the Select file... button to create the storage volume container file. The name of my NASLite server is fs1 so the path where I intend to store the container is fs1Disk-0TC_Volume where TC_Volume is the container filename. You can name the file anything you want. When you are done, click on the Next button to continue.
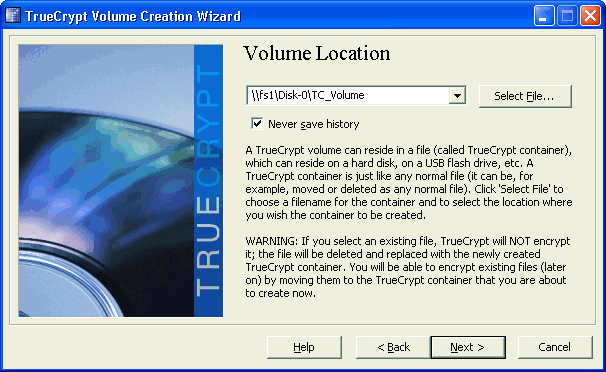
TrueCrypt Volume Creation Wizard - Volume Location
- TrueCrypt Volume Creation Wizard - Encryption Options
-
On the fourth screen of the Wizard, TrueCrypt offers a variety encryption algorithms. I prefer to use the default AES, but if that is not satisfactory, you can select any other option that is most appropriate for your purpose. After you have made your selection, click on the Next button to continue.
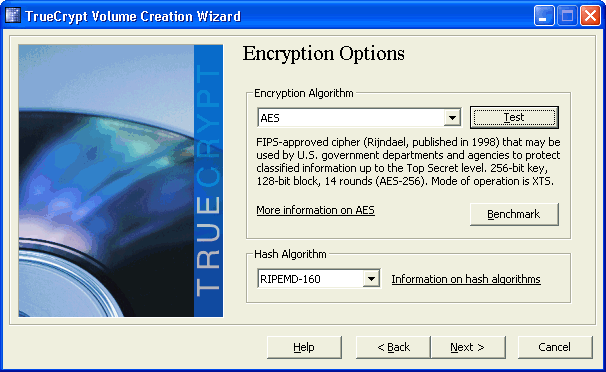
TrueCrypt Volume Creation Wizard - Encryption Options
- TrueCrypt Volume Creation Wizard - Volume Size
-
At the fifth screen we can specify the size of the TrueCrypt storage volume. Provided you have the resources, the volume size can be as big or as small as you need. For the purpose of this tutorial I´ll make a relatively small container of 1GB. Pick the size of your container and click on the Next button to continue.
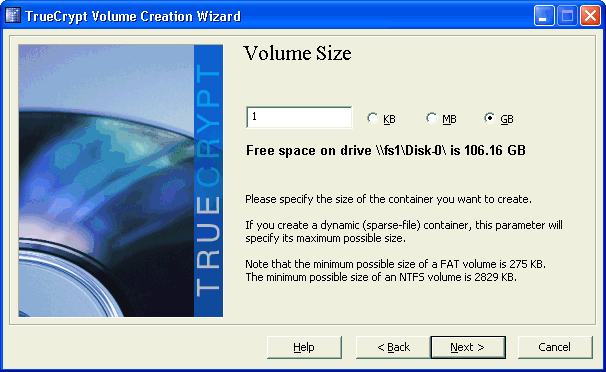
TrueCrypt Volume Creation Wizard - Volume Size
- TrueCrypt Volume Creation Wizard - Volume Password
-
Ah, the password! At the sixth screen you specify the password that will unlock your encrypted storage volume. Keep in mind that if you forget the password you loose the data, so take the necessary precautions and save yourself a headache. With the password entered, click on the Next button to continue.
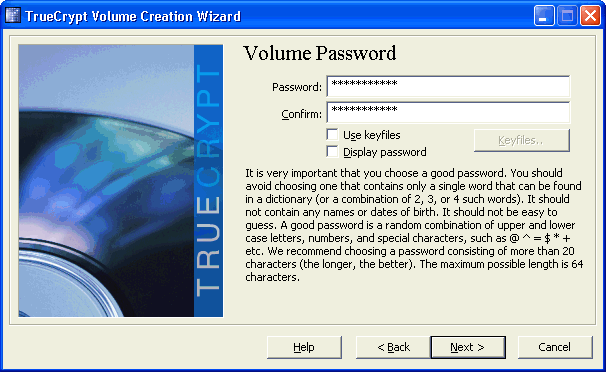
TrueCrypt Volume Creation Wizard - Volume Password
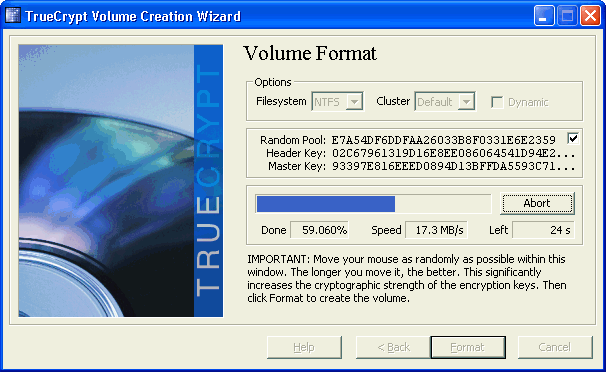
- TrueCrypt Volume Creation Wizard - Volume Format
-
At the seventh screen of the Wizard we can format the storage volume. You can choose from a list of available filesystems appropriate for your Operating System. For Windows, NTFS would be the best choice so that´s what I´ve selected.
Another option worth noting is the Dynamic checkbox. Selecting it would create a storage container file that will grow in size as data is added to it. The alternative will preallocate the space and make the container file as big as the maximum size specified in the Volume Size screen above.
With your formatting options selected, click on the Format button to continue.
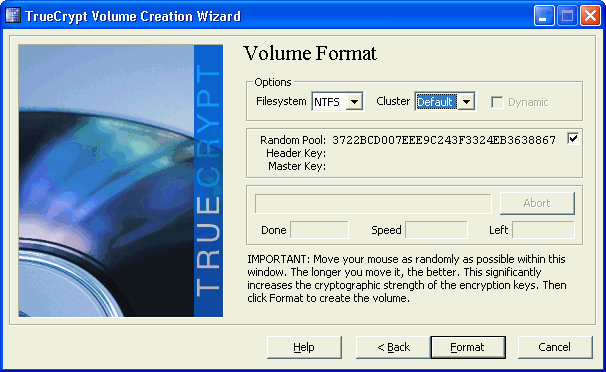
TrueCrypt Volume Creation Wizard - Volume Format
TrueCrypt Volume Creation Wizard - Volume Format in Progress
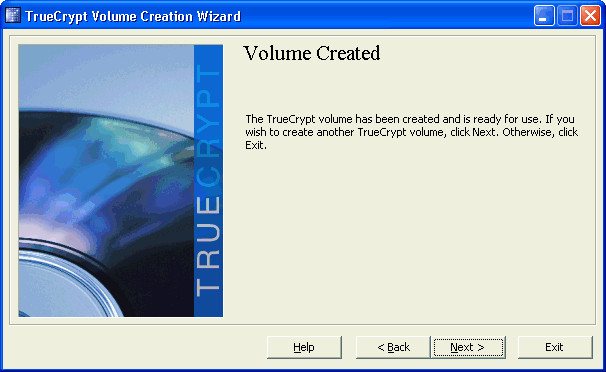
- TrueCrypt Volume Creation Wizard - Volume Created
-
The last screen of the TrueCrypt Volume Creation Wizard confirms completion. If there are any changes that you may wish to make to your storage volume container, use the Back button to repeat the necessary steps. Otherwise, click on the Exit button to close the Wizard.
TrueCrypt Volume Creation Wizard - Volume Created
- Mounting TrueCrypt Storage Volumes
-
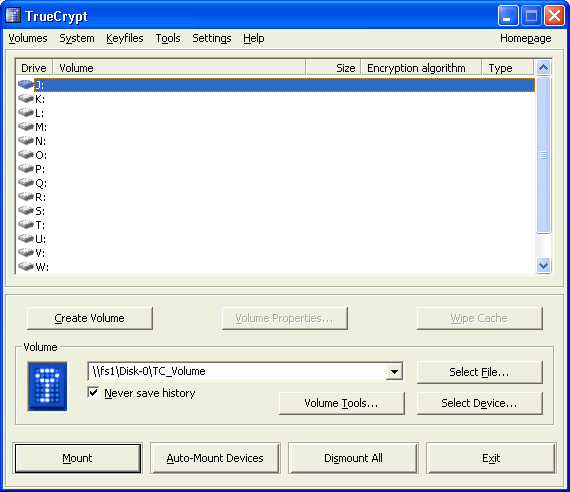
With our new AES encrypted storage volume container residing on our NASLite server, we are now ready to mount and start using it. To mount a TrueCrypt storage volume we need to specify two things at the TrueCrypt Window as follows:
- Select a storage volume container using the Select File... button.
- Select a drive letter to assign to our new mount.
TrueCrypt - Mounting a Volume
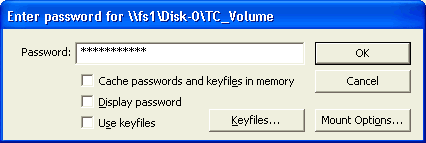
With both of the above conditions met, we can now mount the storage volume using the Mount button. Ah, the password! Clicking the Mount button displays the Volume Password Window. At the Volume Password Window we enter out password and click the OK button. Our TrueCrypt storage volume is now mounted and ready for use.
TrueCrypt - Volume Password
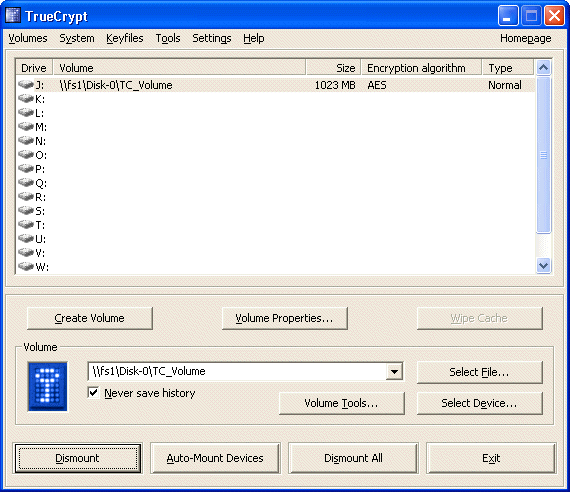
TrueCrypt - Mounted Volume
- Using TrueCrypt Storage Volumes
-
Using truecrypt storage volumes is exactly the same as using a regular disk drive. Once mounted, the TrueCrypt storage volume will appear as a drive under My Computer. You can now use this drive to store you very secret files without concern of a security breach.

TrueCrypt - Local Drive
- Unmounting TrueCrypt Storage Volumes
-
To unmount a TrueCrypt storage volume, select the associated drive letter using the TrueCrypt Window and click on the Dismount button. That´s it, the associated drive will no longer be available for use and will reside safely and silently on your NASLite server share.
![]()
![]()
![]()